
Upgrading the Bosch Purion Display to Kiox
My Cannondale e-bike came with the Bosch Purion as standard, and to be honest, it's a bit basic. It does the job, but it's fiddly to use and the screen tells you next to nothing. After a bit of research, I decided to upgrade to the much more capable Kiox system. Here's how I did it.
Before I dive into the actual upgrade, it's worth explaining the setup.
My e-bike is a Cannondale Canvas Neo running a Bosch Performance Line motor (I think it's a Gen 2 or 3).
Soon after getting the bike, I installed a Volspeed V4 tuning box. This extends the motor's assistance from the standard 15.5mph limit to whatever I want. I typically run it at 20mph, which feels much more natural for someone who's been riding bikes their whole life. The US version of this bike ships with a 20mph limit, so I know the hardware can handle it safely.
The main reason I opted for the standard Kiox display (and not the newer Kiox 300 or 500) is compatibility. My current Volspeed tuning box supports the standard Kiox perfectly, and I didn't fancy paying to upgrade both the display and the tuning box.
The Upgrade
Here's a quick look at the old and new displays. As you can see, the Purion is a bit pants!

The old Purion: a very basic two-tone display with integrated buttons.

The new Kiox: a full-colour display with a separate, wired remote that sits where the Purion used to be.
The first job is to get inside the motor housing, which means removing the non-driveside crank arm.
You'll need an 8mm hex key for the crank bolt and a good quality crank puller to get the arm off. A word of warning: don't even think about trying this without a proper crank puller. You'll just damage the crank, and it will never stay tight again!
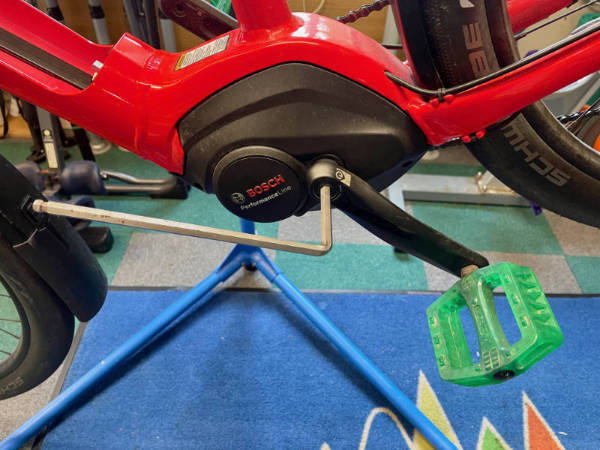
The crank bolt is tight. Turn the 8mm hex key counter-clockwise with a bit of force.
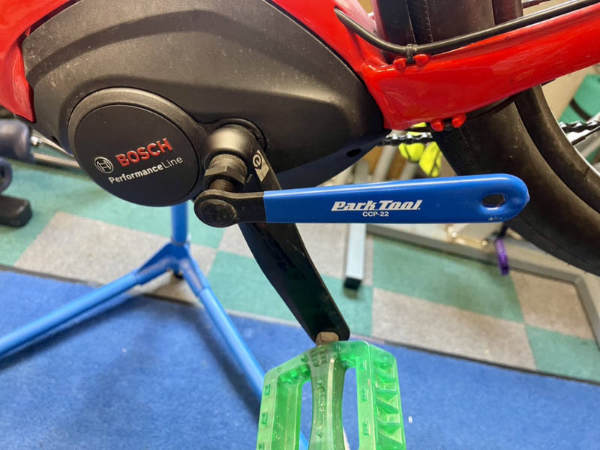
A crank puller is essential. Bodge this and you'll destroy the splined interface, meaning the crank will forever come loose.
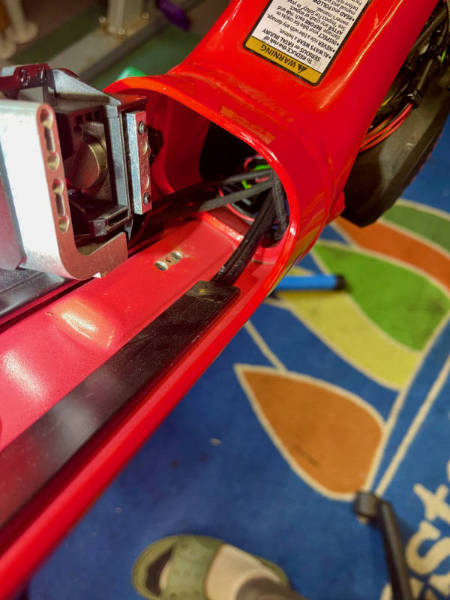
With the cover off, you can get to the wiring loom and, in my case, the Volspeed tuning box.
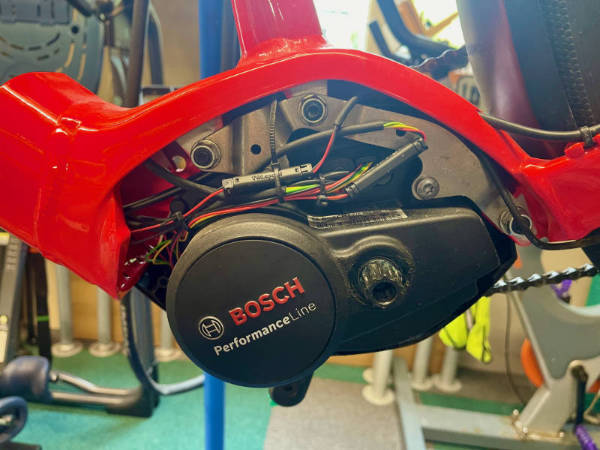
With the cover removed, all the motor's cables are exposed.
The little black box tucked up inside the frame is the Volspeed V4 tuning box.
I knew this was going to be a fairly involved job, so before committing to the full teardown, I did a quick "sanity check" to make sure the new display actually worked with the bike.
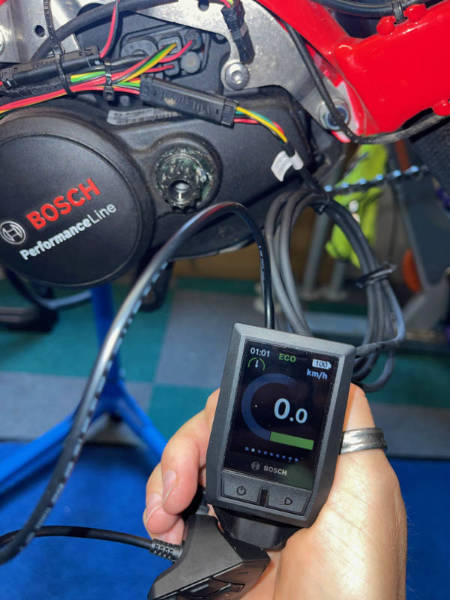
Quick test: unplug the old display, plug in the new one, and power on. Success!
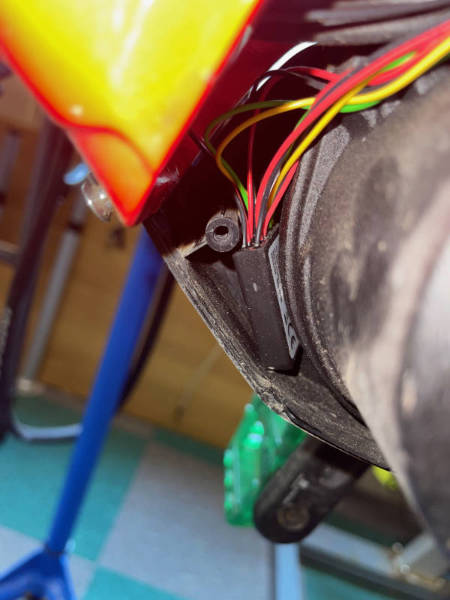
Once I'd confirmed it was working, I disconnected everything, removed the main battery, and set about routing the new cables. On this bike, all the cables run under two black plastic strips inside the downtube where the battery sits. To get them out, the battery connector mounts had to be removed.
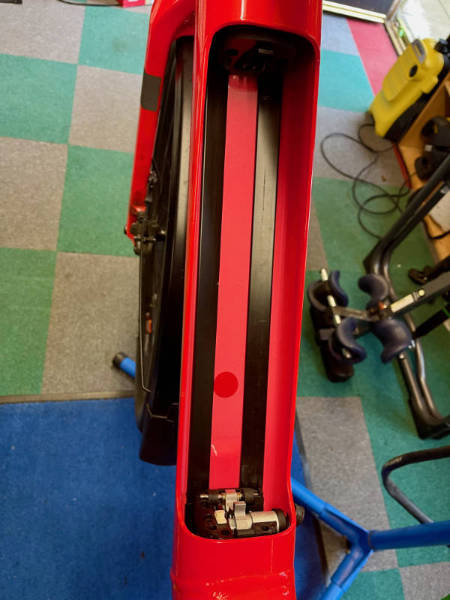
All the wiring is routed under these two black plastic guides in the battery bay.
The upper battery mount, which had to come out to access the guides.
A few small bolts hold the battery mounts in place.
The lower battery mount removed from the frame.
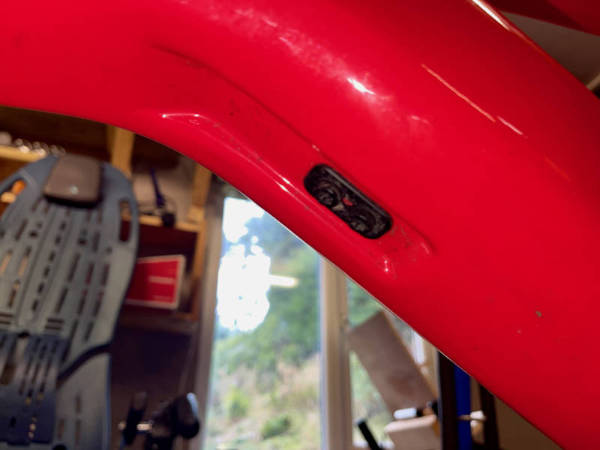
With the mounts and plastic strips gone, the old display cable was easy to pull out. I just had to pop out the rubber cable guide where it exits the frame to get the plug through.
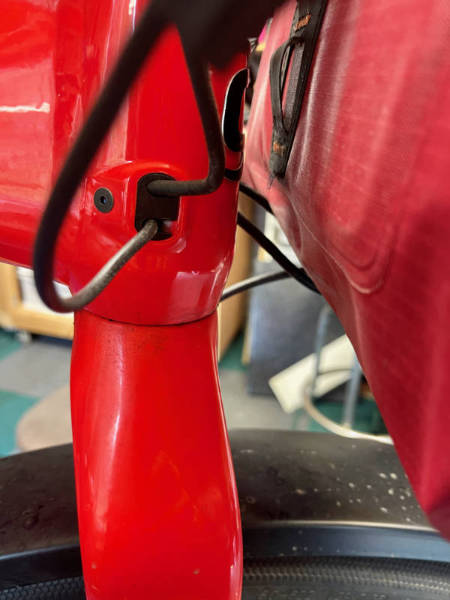
The display cable exits the frame here. The rubber guide had to be removed to get the plug through.
With the old unit completely removed, it was time to install the new Kiox. This is where the first (and only) real problem popped up.
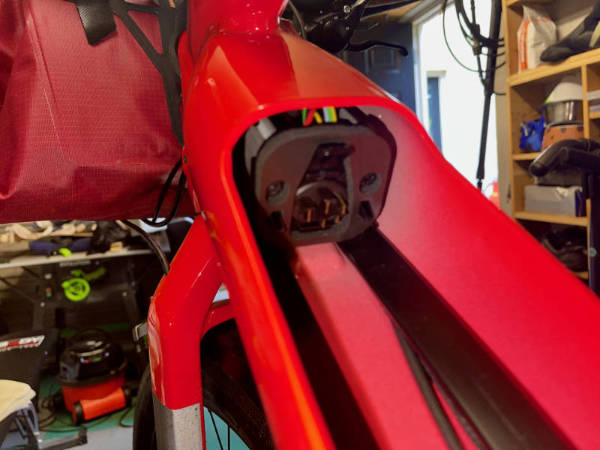
The Kiox mount is designed to replace the stem cap on top of the fork's steerer tube. An M6 bolt passes through the mount and screws into a star-fangled nut inside the steerer. Problem: my bike didn't have one! It used a compression bung with a much larger bolt. Balls!
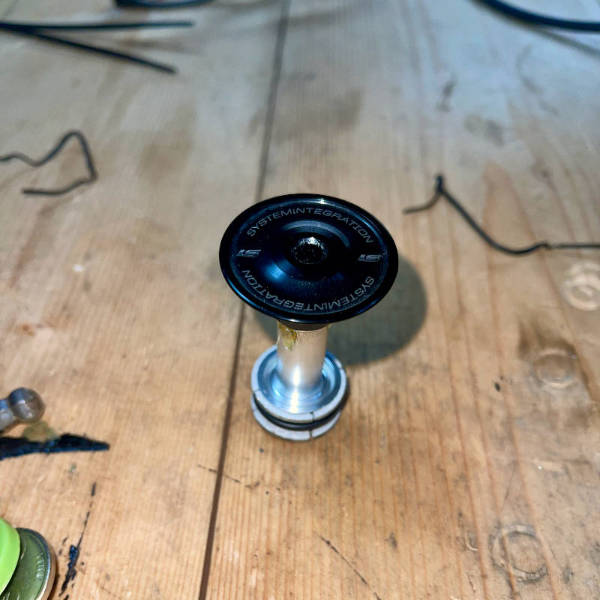
The original compression bung and top cap. No star-fangled nut for the Kiox mount!
This is where working on bikes for over thirty years comes in handy... I have a huge box of spares. A suitable star-fangled nut was soon located and installed.
A new star-fangled nut knocked into the steerer tube. Problem solved.
From there, it was just a case of installing the new display and remote, carefully threading the cable through the frame, plugging everything in, and reassembling the bike.
In total, the job took about an hour. It's a straightforward upgrade for anyone with basic mechanical skills and the right tools (a few hex keys, a crank puller, and ideally a work stand).
The finished result. A much cleaner cockpit and a far more capable display.
The new Kiox display is a massive improvement. It has multiple data screens, connects to your phone via the Bosch eBike Connect app, and can even provide turn-by-turn navigation using your phone's GPS. Was it worth it? Absolutely.
You can see a full gallery of the process in [this shared album](https://www